7 Loading and Running Models
7.1 Using the Models menu
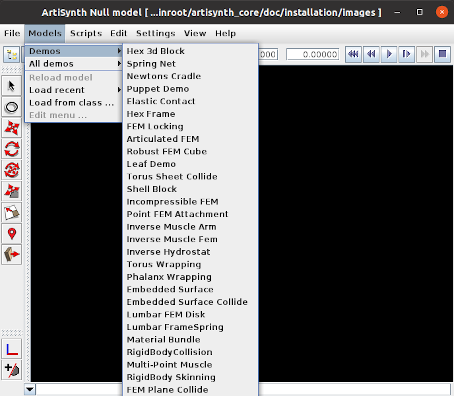
After ArtiSynth starts up, you can load and run demonstration models. Do this by selecting Models > Demos from the main menu and choosing a demo model (Figure 1).
Once a model is loaded, it will appear in the viewer, and simulation can be controlled using the “play” controls located at the upper right of the application window:
From left to right, these are: step size control, which controls the simulation step size (in seconds); current simulation time (in seconds); and the reset, skip-back, play/pause, single-step, skip-forward and stop-all buttons. Starting and stopping a simulation is done by clicking play/pause, while reset resets the simulation to time 0. The single-step button advances the simulation by one time step. The stop-all button will also stop the simulation, as well as any Jython commands or scripts that are running.
Detailed information on how to use the ArtiSynth GUI for model visualization, navigation and simulation control is given in the ArtiSynth User Interface Guide.
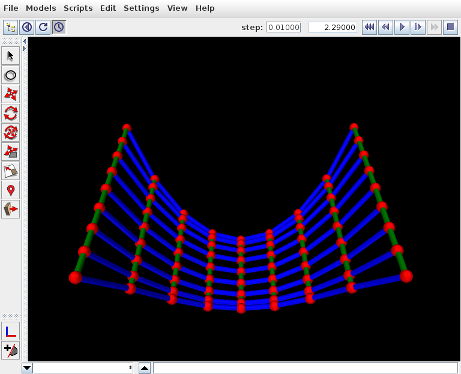
Figure 2 shows ArtiSynth with the Spring Net demo loaded.
7.2 Other ways to load models
It is possible to load models in several ways:
-
•
Using a model menu entry, as described above;
-
•
Specifying the Java class describing the model (“Load from class ...” from the Models menu);
-
•
Specifying a .art file containing a text representation of the model (“Load model ...” from the File menu);
-
•
Reloading a recently loaded model (“Load recent” from the Models menu).
It is also possible to configure ArtiSynth to load a specific model when it starts up; see “Loading, Simulating and Saving Models” in the ArtiSynth User Interface Guide. The model menu can also be customized, as described in “Customizing the Model Menu”.
7.3 Viewing and interacting with models
The ArtiSynth user interface provides a variety of tools for exploring and interacting with models, as described in depth in the ArtiSynth User Interface Guide, including:
-
•
3D viewers with grids and clipping planes;
-
•
Component selection using either a viewer or a tree-based navigation panel;
-
•
Property inspection and editing for selected components;
-
•
3D fixtures for translating, rotating and applying forces to models and their components;
-
•
A timeline for viewing and organizing input/output data streams known as probes;
-
•
Some simple model editing, including the ability to interactively delete components and add marker points;
-
•
Making movies from simulations.
7.4 Command line arguments
If you are running ArtiSynth from a terminal window (Section 5.1) then you can supply it with command line arguments to control different aspects of its behavior. A full list of these can be seen by running artisynth with the -help option:
> artisynth -help
Descriptions of these options appear in various places within the ArtiSynth documentation. For example, one commonly used option is -model <modelClassName>, which instructs ArtiSynth to preload a model associated with a given class name:
> artisynth -model artisynth.demos.mech.SpringMeshDemo
If you are running under Eclipse, command line arguments can be set in the launch configuration, as described in Section 13.4.
![[LOGO]](data:image/png;base64,iVBORw0KGgoAAAANSUhEUgAAAAsAAAAOCAYAAAD5YeaVAAAAAXNSR0IArs4c6QAAAAZiS0dEAP8A/wD/oL2nkwAAAAlwSFlzAAALEwAACxMBAJqcGAAAAAd0SU1FB9wKExQZLWTEaOUAAAAddEVYdENvbW1lbnQAQ3JlYXRlZCB3aXRoIFRoZSBHSU1Q72QlbgAAAdpJREFUKM9tkL+L2nAARz9fPZNCKFapUn8kyI0e4iRHSR1Kb8ng0lJw6FYHFwv2LwhOpcWxTjeUunYqOmqd6hEoRDhtDWdA8ApRYsSUCDHNt5ul13vz4w0vWCgUnnEc975arX6ORqN3VqtVZbfbTQC4uEHANM3jSqXymFI6yWazP2KxWAXAL9zCUa1Wy2tXVxheKA9YNoR8Pt+aTqe4FVVVvz05O6MBhqUIBGk8Hn8HAOVy+T+XLJfLS4ZhTiRJgqIoVBRFIoric47jPnmeB1mW/9rr9ZpSSn3Lsmir1fJZlqWlUonKsvwWwD8ymc/nXwVBeLjf7xEKhdBut9Hr9WgmkyGEkJwsy5eHG5vN5g0AKIoCAEgkEkin0wQAfN9/cXPdheu6P33fBwB4ngcAcByHJpPJl+fn54mD3Gg0NrquXxeLRQAAwzAYj8cwTZPwPH9/sVg8PXweDAauqqr2cDjEer1GJBLBZDJBs9mE4zjwfZ85lAGg2+06hmGgXq+j3+/DsixYlgVN03a9Xu8jgCNCyIegIAgx13Vfd7vdu+FweG8YRkjXdWy329+dTgeSJD3ieZ7RNO0VAXAPwDEAO5VKndi2fWrb9jWl9Esul6PZbDY9Go1OZ7PZ9z/lyuD3OozU2wAAAABJRU5ErkJggg==)